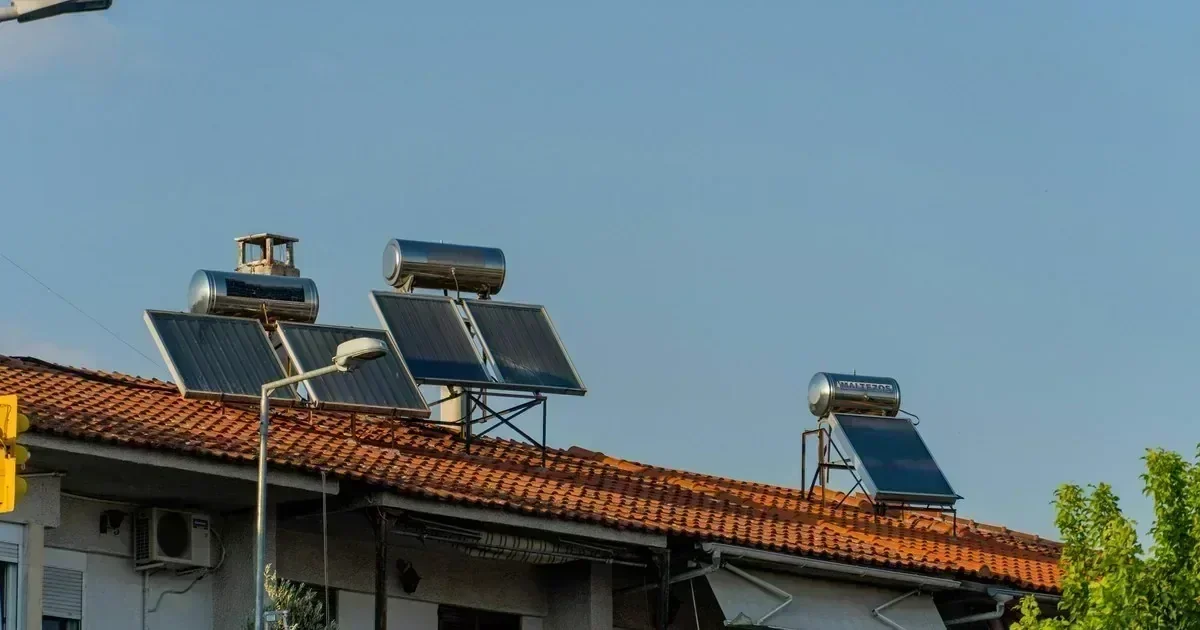
One of the most common questions when planning a solar system is: “Ilang solar panels ba ang kailangan ko?” The answer depends on your electricity consumption, available roof space, and the type of solar system you want. You can get an instant estimate using our free solar calculator for Filipino homes. Just enter your monthly Meralco bill. For the next planning step, see solar roof, shade, tilt, and orientation guide.
Quick Answer: How Many Solar Panels Do You Need?
The number of solar panels you need depends on daily kWh use, roof space, panel wattage, sunlight, system losses, and your target offset. A peso bill alone cannot size a system accurately. Start with several recent kWh readings, convert them to average daily use, then compare the required PV capacity with your roof and inverter limits.
| Monthly use | Daily average | What it tells you |
|---|---|---|
| 300 kWh | ~10 kWh/day | Smaller residential array may be enough, depending on roof and losses. |
| 450 kWh | ~15 kWh/day | Mid-size residential planning becomes more relevant. |
| 600 kWh | ~20 kWh/day | Requires careful PV, inverter, roof and load-timing analysis. |
These are planning examples, not production guarantees. Use the CalcSolarPH solar calculator for a first estimate, then have the final electrical design verified.
Start With Your Electricity Bill
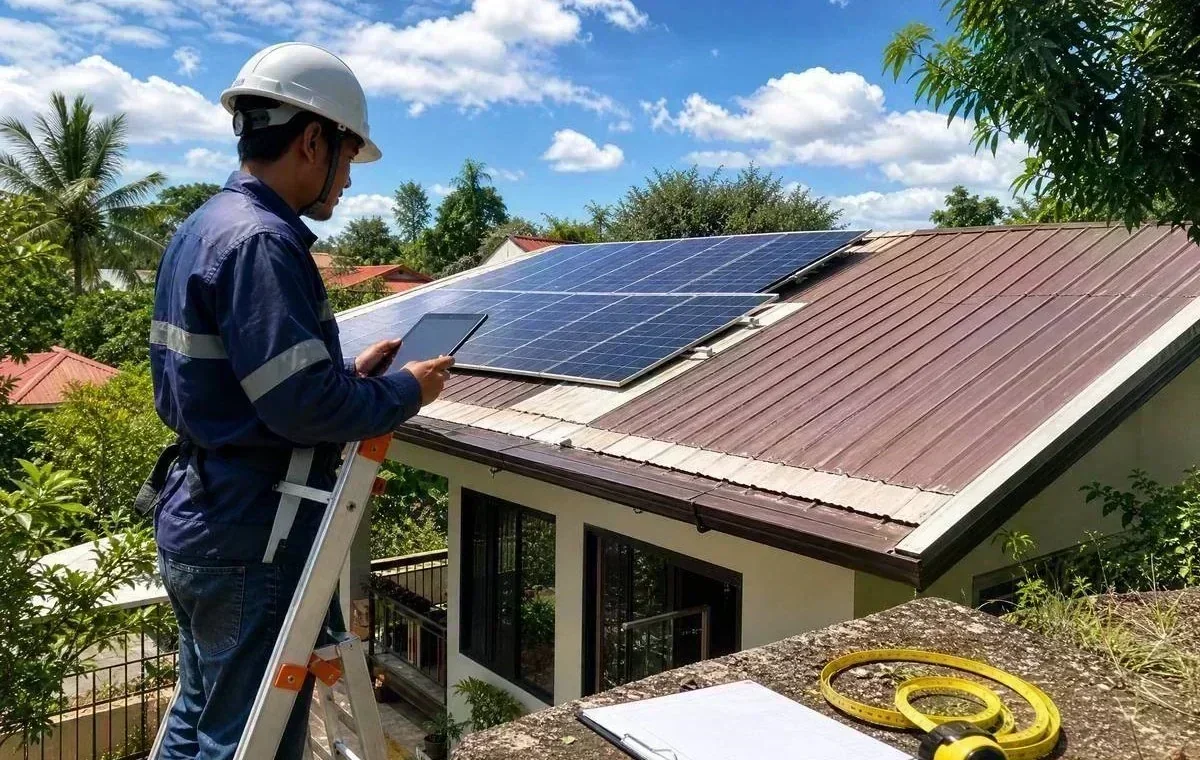
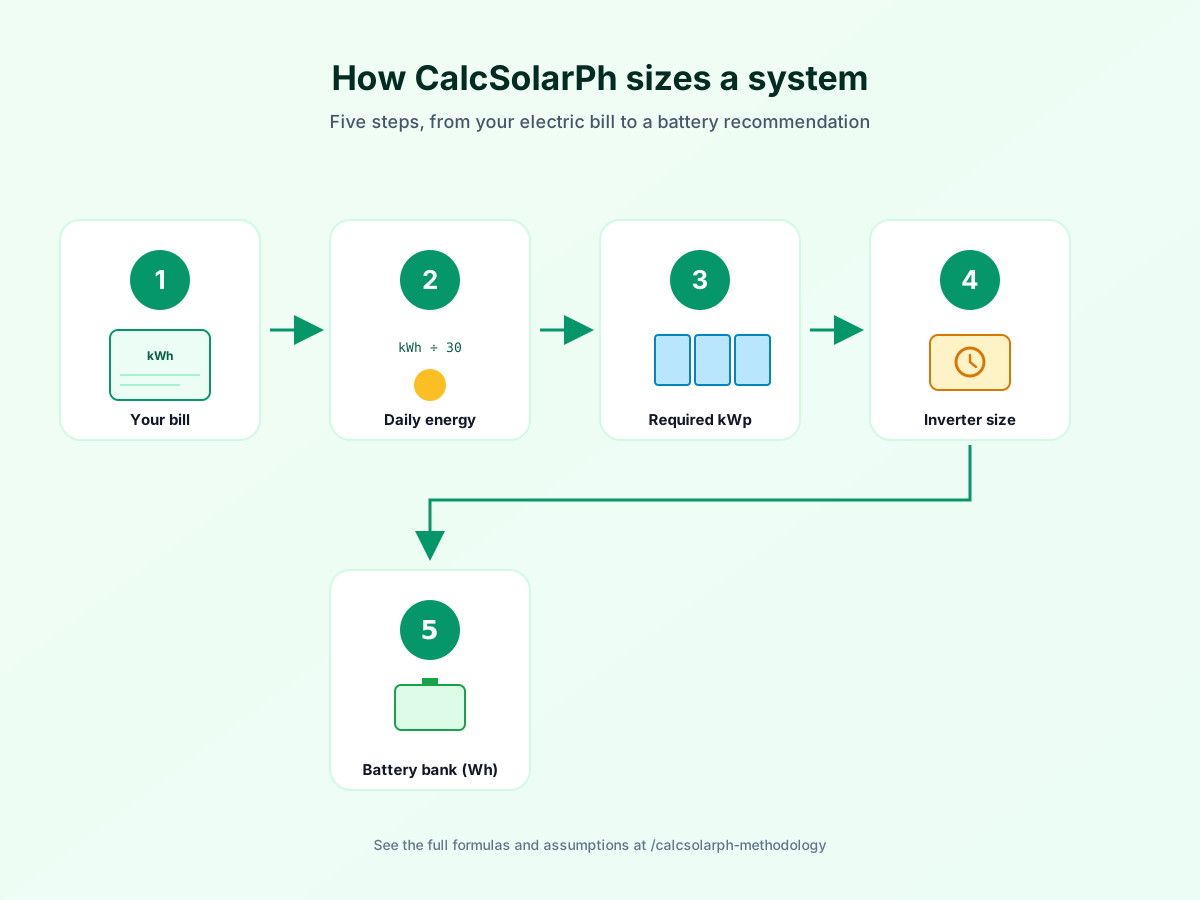
The first step is to check your monthly electricity consumption in kWh. You can usually find this on your Meralco or electricity bill. For example, if your home uses around 400 kWh per month, that is approximately 13 kWh per day. For the next planning step, see how to read your Philippine electric bill. For a personalized system check, use the CalcSolarPH solar calculator.
Consider Your Solar Panel Capacity
Solar panels come in different sizes, such as 450W, 550W, 600W, and 650W. However, the total panel wattage doesn't equal the actual electricity generated every day because production depends on sunlight, weather, panel orientation, temperature, and other factors.
For example, a system with 4 × 650W panels has a total capacity of 2.6kW. Under good conditions, it can generate a significant amount of electricity during the day, but actual daily production will vary.
Don't Forget the Battery
If you want to use solar power at night or during power interruptions, you may need a battery. The required battery capacity depends on how much power you want to use at night and how long you want the battery to provide backup. Decide first whether you need an off-grid, hybrid, or grid-tied system, since that determines how much battery storage actually makes sense for your home.
Match the Inverter to Your Needs
The inverter should also be properly sized for your expected loads. Consider both your normal running load and appliances with high starting or surge power, such as refrigerators, pumps, washing machines, and air conditioners. For the next planning step, see inverter sizing for motors, pumps, and refrigerators.
Final Tip
A good solar system is not simply about installing as many panels as possible. The solar panels, inverter, battery, wiring, and household loads should be properly matched. Understanding your actual electricity consumption is the best starting point for designing a system that gives you good savings without unnecessary expenses. For exact hardware sizing, compare real prices in our solar product catalog. For the next planning step, see our inverter and panel sizing guide.
A Simple Solar Sizing Method for Filipino Homes
Convert your monthly consumption into an approximate daily requirement by dividing monthly kWh by the number of days in the billing period. Then allow for solar production losses from heat, dust, wiring, inverter conversion, orientation, and weather. A sizing estimate is a starting point, not a promise of identical daily output. Use at least twelve months of bills when possible so unusually low or high consumption does not distort the system size.
Example: from monthly kWh to panel capacity
A home using 450 kWh per month consumes roughly 15 kWh per day on average. If a preliminary design uses a conservative production assumption, the required array may be several kilowatts rather than exactly 15 kW because panels produce energy over daylight hours and do not operate at their nameplate rating continuously. The final panel count depends on the selected wattage, roof space, shading, system type, and the designer’s production model.
Separate Daytime Loads From Backup Loads
For grid-tied savings, the priority is often matching daytime solar production with loads such as refrigeration, water pumping, laundry, and office equipment. For backup, list the appliances that must remain available during an outage and their expected runtime. This prevents paying for a large battery to support appliances that could simply be scheduled during sunlight hours.
What a Professional Design Should Confirm
A proper proposal should show the estimated annual or monthly production, panel model and quantity, inverter rating, battery usable capacity if included, roof layout, protection devices, expected self-consumption, and assumptions about shading. Ask how the design handles refrigerator or pump starting current and what happens when the grid is unavailable. Use our solar sizing calculator for an initial estimate, then have a qualified installer verify the final design.
After the Calculator: Installation, Troubleshooting, and Component Checks
A calculator result is a planning starting point, not a permission to energize a solar installation without verification. Once you have a preliminary panel, inverter, and battery recommendation, the next step is to turn the estimate into a safe installation brief. Record the selected equipment, operating voltage, maximum PV voltage, expected current, battery chemistry, protection devices, roof conditions, shading assumptions, and the appliances that must remain available during an outage.
A practical DIY workflow: plan, build, verify, then energize
Competent DIY builders can add real value before an installer arrives by documenting the site, preparing the equipment list, and checking that the design is internally consistent. Treat the work as four separate stages. Do not skip from a calculator result directly to live wiring.
| Stage | DIY-safe work | Qualified-person checkpoint |
|---|---|---|
| 1. Plan | Record monthly kWh, daytime and backup loads, roof measurements, shading, cable routes, equipment model numbers, and datasheet limits. | Confirm string voltage, current, inverter compatibility, battery charge limits, protection ratings, grounding, roof loading, and utility requirements. |
| 2. Prepare | Create an equipment checklist, label intended cable routes, inspect packaging, photograph serial numbers, and keep manuals and warranty documents together. | Approve mounting, clearances, disconnect locations, conductor types, overcurrent protection, surge protection, and emergency shutdown provisions. |
| 3. Assemble | Perform only the mechanical work and de-energized preparation that the equipment manual and local rules permit, using the specified tools and torque values. | Make or inspect electrical terminations, grounding and bonding, battery connections, AC connections, and any grid-interactive work. |
| 4. Commission | Review labels, photographs, documentation, visible defects, monitoring setup, and the handover checklist without probing live circuits. | Complete required inspection and testing with correctly rated instruments, configure protections, verify anti-islanding or backup behavior, and authorize energization. |
For a small off-grid system, a capable DIY builder may be able to handle more of the mechanical preparation and documentation. For rooftop work, high-voltage battery banks, household AC distribution, or any grid-connected or net-metered system, involve a qualified professional early rather than using the website as a substitute for design approval.
DIY pre-energization checklist
Before asking for commissioning, confirm that the panel model and quantity, inverter PV window, battery nominal voltage, battery-management-system requirements, cable specifications, disconnects, fuses, breakers, SPDs, labels, grounding plan, mounting hardware, and enclosure ratings are documented. Check that every connector type is compatible, every cable entry is weather-protected, and no conductor is rubbing against a sharp edge. Photograph the completed installation and keep a one-line diagram, datasheets, serial numbers, torque record, and warranty contacts.
A useful DIY handover folder answers five questions: what equipment is installed; what are its voltage, current, temperature, and environmental limits; which protection device isolates each section; what conditions require a shutdown; and who is responsible for final testing and repairs. IEC PV guidance emphasizes inspection, testing, documentation, and maintenance as part of a proper handover rather than treating installation as complete when the equipment simply turns on.
A safer troubleshooting decision path
When production is low or the battery is not charging, work from the outside in. First compare weather, shade, time of day, state of charge, scheduled charging, and monitoring alarms. Next inspect the equipment from a safe distance for heat, smell, moisture, damage, connector discoloration, and protection-device status. If the issue remains, capture the fault code, timestamp, operating mode, and recent changes for the installer. Do not convert an information problem into an electrical experiment.
DIY troubleshooting gate
Observe: weather, monitoring data, alarms, visible condition, and protection status. Document: model numbers, timestamps, photos from a safe position, and what changed. Escalate: live measurements, enclosure opening, conductor repair, battery protection changes, repeated trips, or grid-connected faults.
Safety boundary
Solar panels can produce DC power whenever light is present, and batteries can deliver very high fault current even when the inverter is switched off. Do not work on energized conductors, climb onto a wet or unstable roof, bypass a fuse or breaker, open a sealed battery, or connect a grid-interactive system without a qualified solar professional. Follow the equipment manuals, Philippine Electrical Code requirements, utility rules, and local inspection requirements.
A safe handoff checklist after sizing
Before installation, ask the installer to confirm the design against the actual datasheets rather than only the calculator summary. The panel string voltage must remain within the inverter’s cold-weather and operating limits; the battery voltage and charge current must match the inverter and battery-management system; and every conductor, disconnect, fuse, breaker, surge-protection device, grounding connection, and enclosure must be selected for the installation conditions. Ask for a one-line diagram, equipment model numbers, protection ratings, expected production assumptions, and a commissioning checklist.
For a grid-connected system, the installer should also explain the required utility process, anti-islanding behavior, meter changes if applicable, inspection, and the conditions under which the system may be energized. A preliminary online estimate cannot replace those site-specific checks.
Why a battery may not be charging
Start with observation, not disassembly. Check the monitoring screen for a charge-disabled state, low-PV warning, battery communication alarm, temperature warning, or state-of-charge limit. Compare the time of day and weather with the expected solar window, then check whether the battery is already full, reserved for backup, or restricted by a charge schedule. Look for visible damage, swelling, moisture, burnt smell, unusual heat, or a tripped protection device. If any of these signs are present, stop using the system and contact the installer.
A battery that remains at the same state of charge on a bright day may have a PV-side issue, a controller or inverter setting issue, a communication problem, a battery-protection lockout, or a failed component. Do not bridge terminals, substitute a charger, change lithium charging limits, or reset protection settings without the manufacturer’s procedure and a qualified technician.
How to recognize an MPPT controller problem
An MPPT controller is worth investigating when the array is receiving useful sunlight but the monitoring data shows no PV voltage, no charging current, repeated restarts, an over-temperature warning, or a persistent fault code. First compare the controller display with the inverter or monitoring portal and check whether the PV disconnect, battery protection, or communication link is open. A single low-production day is not enough evidence because clouds, shade, soiling, and heat can change output.
Only a qualified person using appropriately rated solar test equipment should measure live PV circuits or open a combiner enclosure. Never assume that switching off the inverter has made the array safe; sunlight may still energize the DC side.
Loose connections, corrosion, and common wiring mistakes
Visible warning signs include discolored insulation, melted connector bodies, cracked cable glands, corrosion, water entry, a hot smell, intermittent monitoring, unexplained voltage drops, or a breaker that trips repeatedly. Common installation mistakes include mixing incompatible connector brands, leaving connectors under mechanical tension, using undersized or damaged conductors, reversing polarity, routing cables where they rub against metal, omitting strain relief, and placing protection devices where they cannot be inspected.
Do not tighten, re-terminate, or clean an energized connection. Photograph the warning sign from a safe distance, note the time and operating conditions, isolate the area if the equipment is visibly damaged, and call the installer. Repeated breaker trips and hot connections are fault signals, not inconveniences to be defeated.
How to check whether a solar panel is still performing
Homeowners can begin with non-contact checks: compare daily production with similar clear-weather days, inspect for new shade or heavy soiling from ground level, review inverter fault history, and look for cracks, delamination, burn marks, or damaged cables. A panel’s nameplate wattage is a laboratory rating under specified test conditions; field output varies with irradiance, temperature, orientation, wiring, and system limits.
A proper electrical performance test may require an irradiance reference, temperature measurement, an I-V curve tracer, insulation testing, and a calibrated meter rated for the system’s DC voltage and measurement category. That is technician work. Do not short a panel, probe exposed connectors, or compare a module’s output using an incorrectly rated multimeter.
How to screen a LiFePO4 battery before buying
A genuine battery is not proven by a printed label or a low price. Ask for the exact model datasheet, serial-number verification, warranty terms, rated capacity test conditions, maximum continuous charge and discharge current, operating-temperature limits, Battery Management System protections, cell configuration, charger requirements, and local service contact. Check that the seller’s specifications are internally consistent and that the model can communicate safely with the intended inverter.
Avoid packs with altered labels, missing serial records, vague cycle-life claims, no BMS documentation, unexplained capacity differences, swollen cases, damaged terminals, or pressure to bypass recommended charging limits. A capacity test should follow the manufacturer’s procedure with suitable instrumentation; do not open the pack or test its cells individually as a DIY authenticity check.
Stop-work triggers for DIY inspection
Stop immediately when there is smoke, arcing, a burning smell, swelling, leakage, exposed conductor, cracked module glass, water inside an enclosure, repeated protection trips, an unexplained shock, roof damage, or a fault that returns after reset. Keep people away, do not touch the equipment, and contact the installer or emergency responders as appropriate. In a fire or flooding event, tell responders that PV modules and batteries are present because parts of the system may remain energized.
For additional background, review the Fluke solar PV safety guidance, the ESFI solar electrical-safety guidance, the Philippine DOE residential solar estimate reference, and IEC PV inspection and documentation guidance. These references support safe decision-making; they do not replace a site inspection, current utility rules, or a licensed professional’s work.
Your Electric Bill Is the Starting Point, Not the Whole Calculation
A monthly bill can estimate energy consumption, but solar design also needs your daytime usage, nighttime usage, peak load, roof area and backup goal. If most of your electricity is consumed during the day, a grid-tied or self-consumption-focused design may need less battery capacity. If backup is the priority, the battery becomes a much larger part of the system.
| You know... | It helps determine... |
|---|---|
| Monthly kWh | The energy target and a first estimate of PV size. |
| Peak simultaneous watts | Inverter output and circuit/load design. |
| Day vs night consumption | How much battery capacity is actually useful. |
| Roof dimensions and shade | Whether the required PV capacity physically fits. |
| Backup hours required | Battery energy and essential-load selection. |
A system should be sized around your energy pattern, not just your bill amount. Two ₱10,000/month households can need different equipment if one has heavy daytime air-conditioning and the other uses most electricity after sunset.
A Better First Step
Enter your bill and load information into the CalcSolarPH solar calculator, then use the result as a planning range. Treat the output as a starting point for quotation and engineering review, not a substitute for an on-site electrical and roof assessment.
Frequently Asked Questions
Can a monthly bill alone determine a reliable preliminary system size?
No. A bill is useful for estimating energy consumption, but a dependable system design also requires load timing, roof conditions, shade, system type, backup goals, and local installation constraints.
Do I need batteries if I am connected to the grid?
Not necessarily. Batteries can provide backup and increase self-consumption, but a grid-tied system may meet savings goals without storage. The right choice depends on outage needs, export-credit rules, and budget.
Philippine Bill Example: Turning Monthly kWh Into a Planning Estimate
A Meralco-style planning calculation should start with the kWh on the bill, not only the peso total. Suppose a household used 350 kWh in one billing month and uses an editable planning assumption of ₱14.80/kWh. The simple reference bill is 350 × ₱14.80 = ₱5,180. If a preliminary solar model expects 180 kWh/month of daytime self-consumption, the avoided imported-energy estimate is 180 × ₱14.80 = ₱2,664 before fixed charges, taxes, rate changes, battery losses, export treatment, and system downtime. This is not a quote or guaranteed savings.
| Planning item | Example | Meaning |
|---|---|---|
| Monthly use | 350 kWh | Energy imported over the billing period |
| Assumed rate | ₱14.80/kWh | Editable estimate, not a current tariff promise |
| Daytime self-consumption | 180 kWh/month | Solar energy used directly by the home |
| Remaining imported energy | 170 kWh/month | 350 − 180, before other bill components |
Source and date note: This planning example uses an editable assumption, not a permanent Meralco tariff. Meralco’s official bill-breakdown page explains that residential bills combine generation, transmission, system loss, distribution, taxes, subsidies, and other regulated or pass-through charges. Verify the current bill and utility requirements before making a purchase or installation decision. See Meralco’s bill breakdown and Meralco’s solar and net-metering guidance.
350 kWh Monthly Consumption: Meralco-Style Bill and Solar Savings Simulation
This is a transparent planning illustration, not an official current Meralco tariff quote. It uses an editable assumption of ₱14.80/kWh. Meralco explains that a residential bill contains multiple components, and the percentages below are an illustrative breakdown based on its published 2025-average breakdown.
| Planning metric | Illustrative value | How it is calculated |
|---|---|---|
| Monthly consumption | 350 kWh | User scenario |
| Planning bill | ₱5,180 | 350 kWh × ₱14.80/kWh |
| Solar self-consumption | 180 kWh/month | Illustrative daytime solar used directly by appliances |
| Remaining imported energy | 170 kWh/month | 350 − 180 kWh |
| Avoided energy value | ₱2,664/month | 180 kWh × ₱14.80, before fixed charges, rate changes, losses, and export treatment |
Do not interpret the ₱2,664 figure as a guaranteed total bill reduction. Actual savings depend on current rates, the timing of solar production and appliance use, battery losses, system availability, exported energy treatment, taxes, fixed charges, and utility requirements. Verify current information with Meralco’s official bill breakdown.
500 kWh Monthly Consumption: Meralco-Style Bill and Solar Savings Simulation
This is an illustrative planning scenario, not an official current Meralco tariff quote. It uses an editable ₱14.80/kWh assumption and an illustrative 260 kWh/month of solar energy consumed directly by daytime loads.
| Planning metric | Illustrative value | How it is calculated |
|---|---|---|
| Monthly consumption | 500 kWh | User scenario |
| Planning bill | ₱7,400 | 500 × ₱14.80/kWh |
| Solar self-consumption | 260 kWh/month | Illustrative daytime solar used directly |
| Remaining imported energy | 240 kWh/month | 500 − 260 kWh |
| Avoided-energy value | ₱3,848/month | 260 × ₱14.80, before fixed charges, losses, rate changes, and export treatment |
The ₱3,848 figure is not a guaranteed total bill reduction. Actual savings depend on current rates, solar/load timing, battery losses, system availability, exported-energy treatment, taxes, fixed charges, and utility requirements. Verify current information with Meralco’s official bill breakdown.